> ## Documentation Index
> Fetch the complete documentation index at: https://docs.endgame.io/llms.txt
> Use this file to discover all available pages before exploring further.
# Snowflake
> Connect Snowflake tables to Endgame
Use the instructions below to enable the Snowflake integration in Endgame. Once enabled, Endgame will query your Snowflake data once per hour and include Snowflake insights in your Endgame chats.
## Adding the App
Connecting to Snowflake requires that the user is an ACCOUNTADMIN or
equivalent and has OpenSSL installed on their local machine.
Endgame uses [key-pair authentication](https://docs.snowflake.com/en/user-guide/key-pair-auth) to connect to your Snowflake account. Generate a key pair by running these commands in your terminal:
```
# Generate a private key (PKCS8 format, unencrypted)
openssl genrsa 2048 | openssl pkcs8 -topk8 -inform PEM -out snowflake_key.p8 -nocrypt
# Extract the public key
openssl rsa -in snowflake_key.p8 -pubout -out snowflake_key.pub
```
This creates two files:
* `snowflake_key.p8` — Your private key (you'll provide this to Endgame)
* `snowflake_key.pub` — Your public key (you'll register this in Snowflake)
Keep your private key secure. Do not share it or commit it to version control.
Open a SQL worksheet in Snowflake (click + Create → SQL File) and run the following commands.
1. Create a read-only role:
```
CREATE ROLE ENDGAME_CONNECTOR_READONLY;
```
This creates a new role with no permissions. You'll grant specific permissions in the next steps.
2. Grant warehouse access:
```
GRANT USAGE ON WAREHOUSE TO ROLE ENDGAME_CONNECTOR_READONLY;
```
Replace `` with your warehouse name (e.g., COMPUTE\_WH). This allows the role to run queries.
3. Grant database access: For each database you want Endgame to access, grant the appropriate permissions:
**For standard databases:**
```
GRANT USAGE ON DATABASE TO ROLE ENDGAME_CONNECTOR_READONLY;
GRANT USAGE ON ALL SCHEMAS IN DATABASE TO ROLE ENDGAME_CONNECTOR_READONLY;
GRANT SELECT ON ALL TABLES IN DATABASE TO ROLE ENDGAME_CONNECTOR_READONLY;
GRANT SELECT ON ALL VIEWS IN DATABASE TO ROLE ENDGAME_CONNECTOR_READONLY;
-- For future objects (so new tables are automatically accessible)
GRANT USAGE ON FUTURE SCHEMAS IN DATABASE TO ROLE ENDGAME_CONNECTOR_READONLY;
GRANT SELECT ON FUTURE TABLES IN DATABASE TO ROLE ENDGAME_CONNECTOR_READONLY;
GRANT SELECT ON FUTURE VIEWS IN DATABASE TO ROLE ENDGAME_CONNECTOR_READONLY;
```
**For shared/imported databases:**
```
GRANT IMPORTED PRIVILEGES ON DATABASE TO ROLE ENDGAME_CONNECTOR_READONLY;
```
4. Create the service user:
First, get your public key content. Open `snowflake_key.pub` and copy the content between the header and footer lines (exclude `-----BEGIN PUBLIC KEY-----` and `-----END PUBLIC KEY-----`). Remove any newlines so it's a single continuous string.
Then create the user:
```
CREATE USER ENDGAME_SERVICE_USER
TYPE = SERVICE
RSA_PUBLIC_KEY = '';
```
5. Assign the role to the service user:
```
GRANT ROLE ENDGAME_CONNECTOR_READONLY TO USER ENDGAME_SERVICE_USER;
ALTER USER ENDGAME_SERVICE_USER SET DEFAULT_WAREHOUSE = ;
ALTER USER ENDGAME_SERVICE_USER SET DEFAULT_ROLE = ENDGAME_CONNECTOR_READONLY;
```
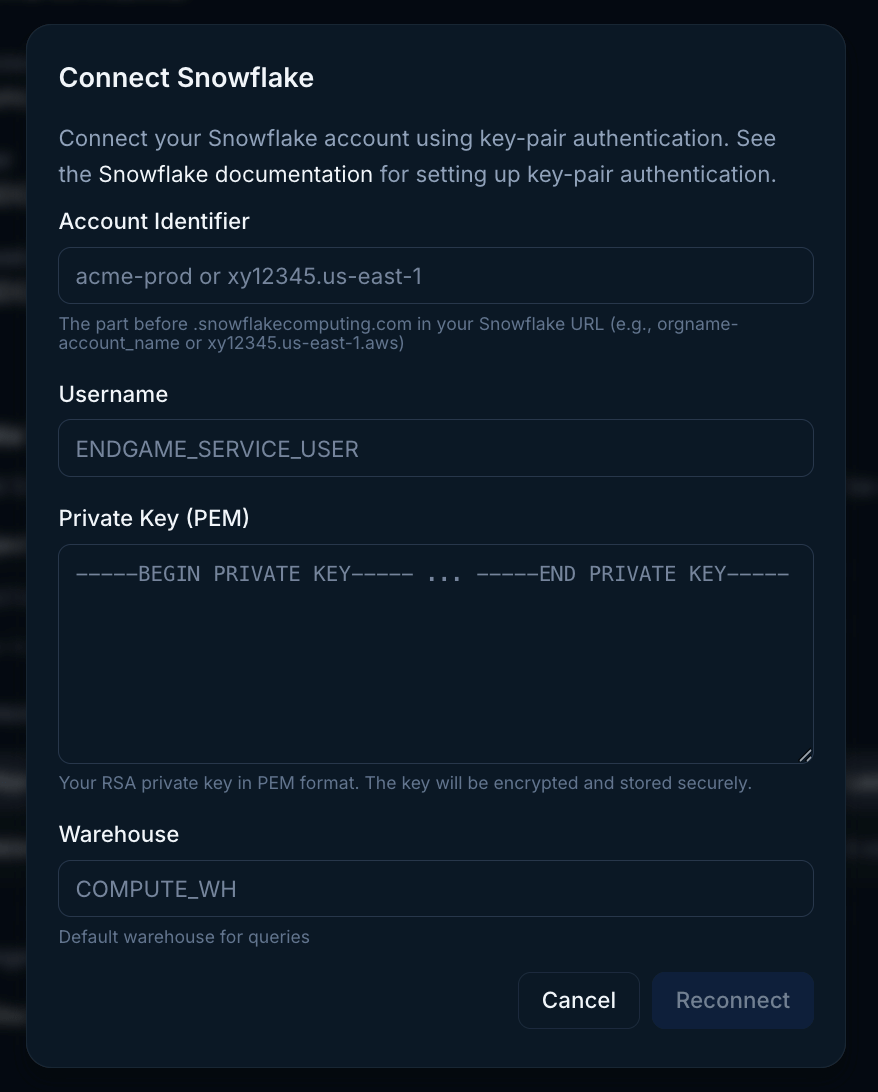
Your Snowflake account identifier is displayed in your Snowflake URL or in the account selector. It follows the format `orgname-accountname` (e.g., `myorg-account123`).
You can also find it by running:
```
SELECT CURRENT_ORGANIZATION_NAME() || '-' || CURRENT_ACCOUNT_NAME();
```
For more details, see [Snowflake Account Identifiers](https://docs.snowflake.com/en/user-guide/admin-account-identifier).
Log into Endgame and navigate to the [integrations](https://app.endgame.io/settings/integrations) page. Click to Connect with Snowflake and enter your organization data in the modal.

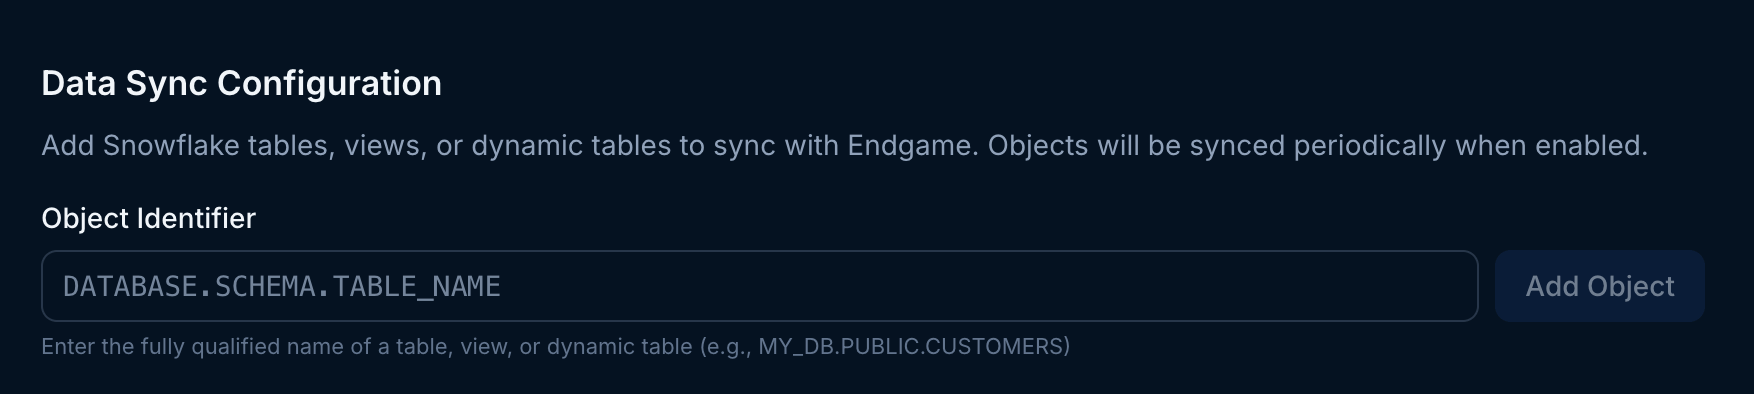
 Once you have successfully connected Endgame to your snowflake instance, you can add object identifiers for the tables, views, or dynamic tables you want to sync to Endgame.
Snowflake views should contain summary or aggregated data. Endgame can not process and analyze raw event data.
**We recommend that any table contain 20k rows or less for best performance.**
Once you have successfully connected Endgame to your snowflake instance, you can add object identifiers for the tables, views, or dynamic tables you want to sync to Endgame.
Snowflake views should contain summary or aggregated data. Endgame can not process and analyze raw event data.
**We recommend that any table contain 20k rows or less for best performance.**
 You may remove an object at anytime by clicking on the trash icon under Actions. This will stop future syncs and delete the associated data in Endgame.
Because of their nature, Snowflake tables are assumed to be applicable at an
organization level, relevant to many accounts. They are not account specific.
You may remove an object at anytime by clicking on the trash icon under Actions. This will stop future syncs and delete the associated data in Endgame.
Because of their nature, Snowflake tables are assumed to be applicable at an
organization level, relevant to many accounts. They are not account specific.